Udo's Blog "Home Automation" mit dem Arduino und 433 MHz Die komplette Fernsteuerung
Électronique en amateur Communication RF 433 MHz entre ATTiny85 et Arduino
LoRa is similar to Bluetooth and WiFi in that it operates in a frequency band allocated to industrial, scientific, and medical (ISM) applications (read more about frequency allocations at this FCC link).The LoRa ISM band permitted in the U.S. is the 902-928 MHz band, while Bluetooth and WiFi operate in the 2400-2483.5 MHz and 5725-5850 MHz (5G WiFi) bands (more on the history of permitted.
433 Mhz Sender und Empfänger NIKOLAUSLUENEBURG.DE
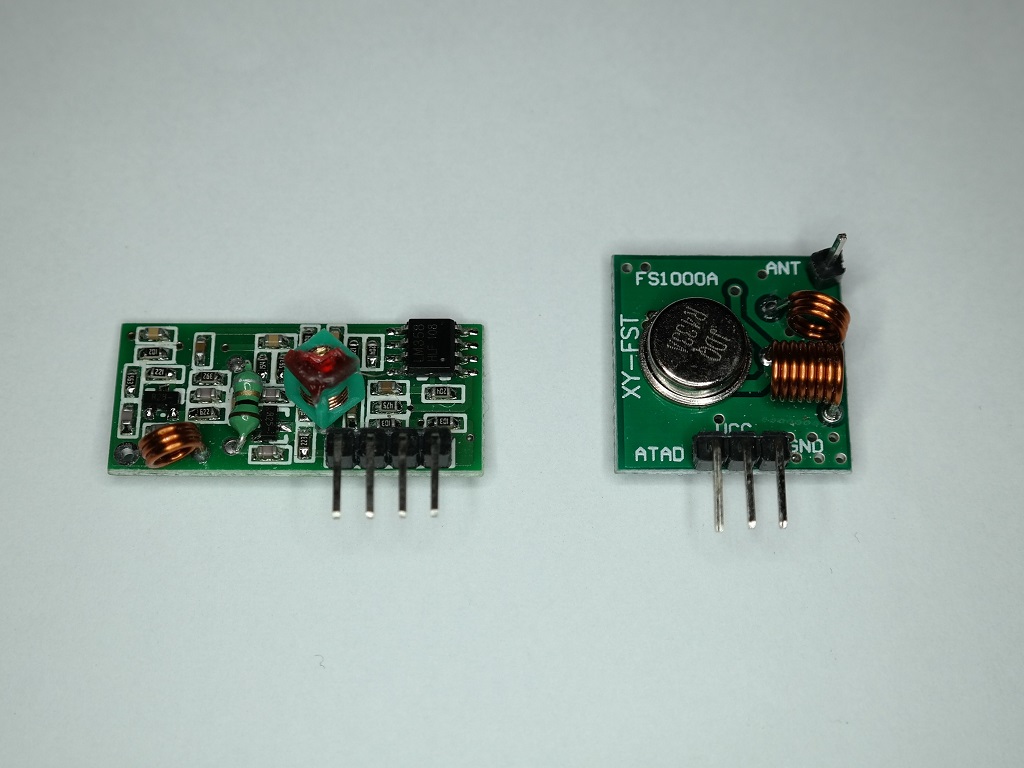
Price: $1 to $2 Specifications RF 433MHz Transmitter Frequency Range: 433.92MHz Input Voltage: 3-12V Price: $1 to $2 Where to buy? You can purchase these modules for just a few dollars. Click here to compare the RF 433MHz transmitter/receiver on several stores and find the best price. Arduino with RF 433MHz Transmitter/Receiver Modules
On Attiny85, by default, what pin can send data to serial monitor via FTDI module? arduino
2. 433 MHz Transmitter 3. DHT11 4. Attiny85 5. This is the weather stations transmitter. My version sends data from 4 sensors: Temperature, Humidity, Light, PIR. 1. dont mind this bunch of wires, it is just a flatcable that I use 7 wires of: PSU 2 wires LDR 2 wires PIR 3 wires 2. 433 MHz Transmitter 3. DHT11 4. Attiny85 5. This is the weather.

Udo's Blog "Home Automation" mit dem Arduino und 433 MHz Die komplette Fernsteuerung
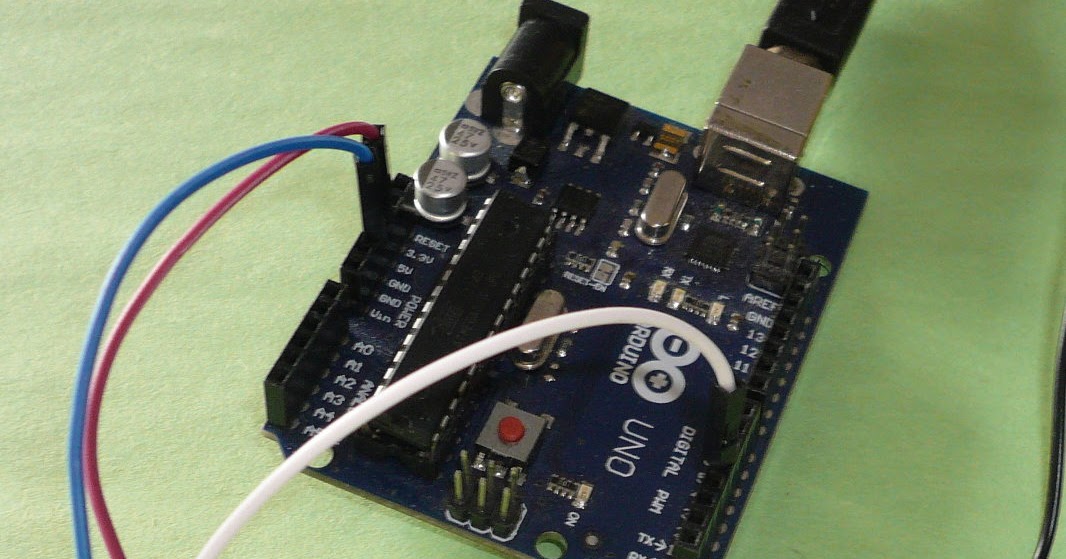
Hello, I am trying to interface ATtiny85 with the cheap 433 MHz radio receiver & transmitter pair: The ATtiny is connected to receiver, Arduino UNO is connected to transmitter. The problem is: Arduino transmits the data, but ATtiny isn't responding to it (the led doesn't light up). I tried to use the newest version of VirtualWire library, but ATtiny doesn't have Timer1. The older version of.

Zusammenarbeit von 433MhzReceiver mit 8OhmLautsprecher, gesteuert durch ATtiny85
For his project, Erdei assembled five wireless sensors, each with the same hardware, including an ATtiny85 microcontroller, 8-pin DIP IC socket, DHT11 temperature/humidity sensor, H34A 433MHz transmitter module, and a power supply with four AA batteries.

Électronique en amateur Communication RF 433 MHz entre ATTiny85 et Arduino
433 MHz Receiver module mini breadboard Optional: 2 wire LCD There are two main libraries used to send and receive data on an Arduino platform: VirtualWire and Manchester code. As Virtualwire is a bit older, no longer supported, and supposedly can only send characters (though there is a way around that) I decided to use Manchester code.
GitHub sweetpi/attiny433mhzsender AVR ATtiny85 433mhz remote control for Intertechno IT
5 SCROLL DOWN TO SEE THE SOLUTION (UPDATE II) ORIGINAL POST: I am currently building a 433MHz remote with two buttons. The remote is controlled by an Attiny85v (8MHz). Sadly it does not work very reliable, sometimes it works other times nothing happens. Here some explanations on what I did and why:

Empfangen und Senden von Daten zwischen ATtiny85 (Arduino IDE 1.06)
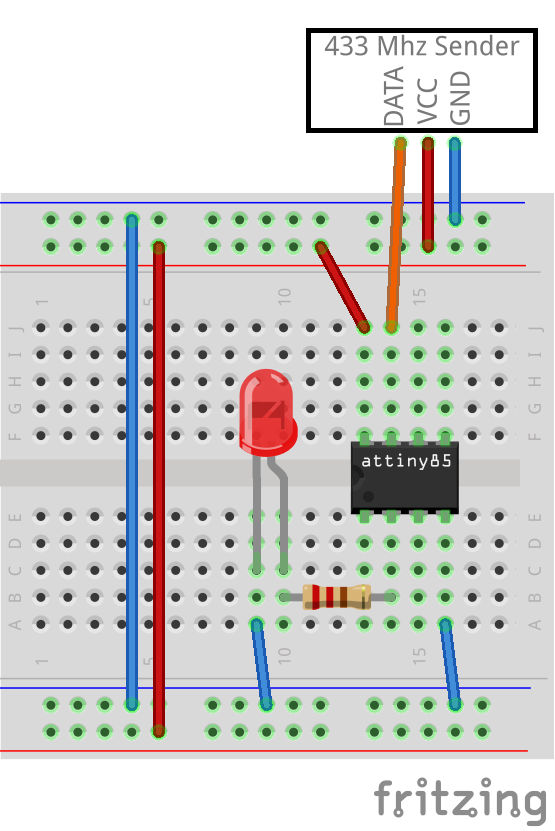
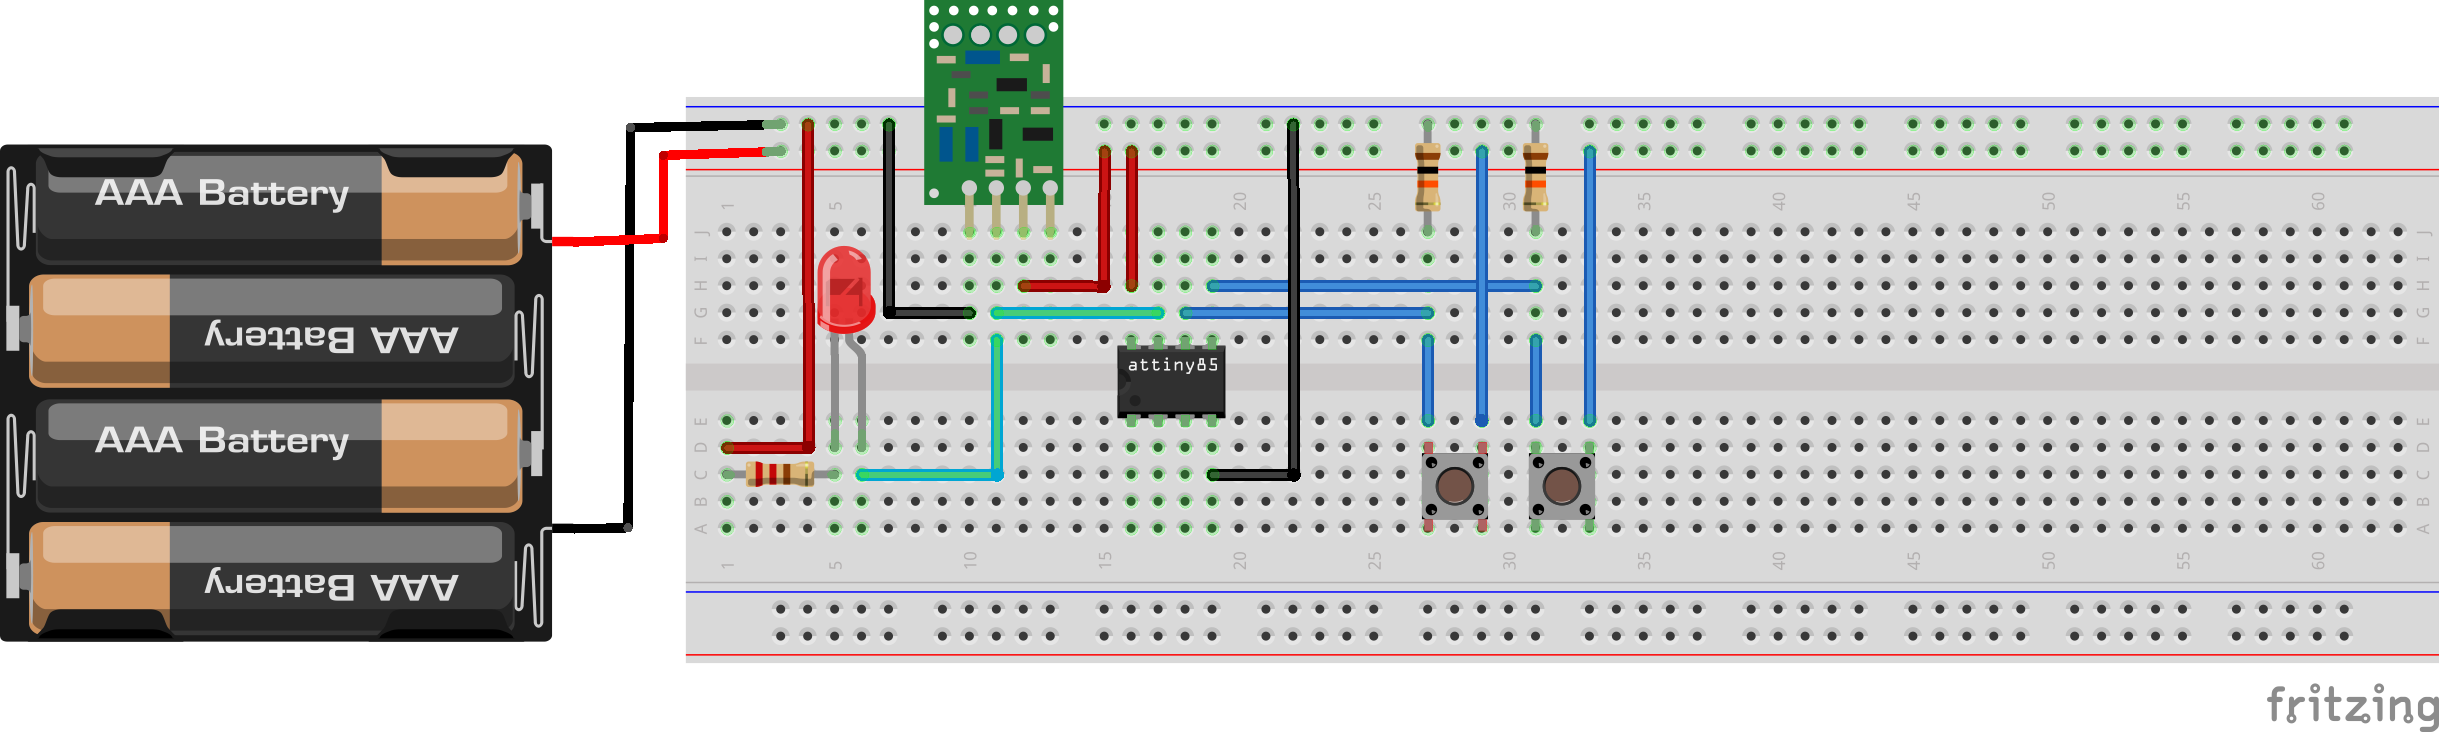
AVR ATtiny85 433mhz remote control for Intertechno IT-1500 power outlets. schematics part list 433Mhz Transmitter Modul AVR ATtiny85 2x 10kOhm Widerstand 2x switch battery holder for 3-5V 1x LED (Optional) 1x LED series resistor (Optional) source and build sudo apt-get install gcc-avr avr-libc Build with make: make
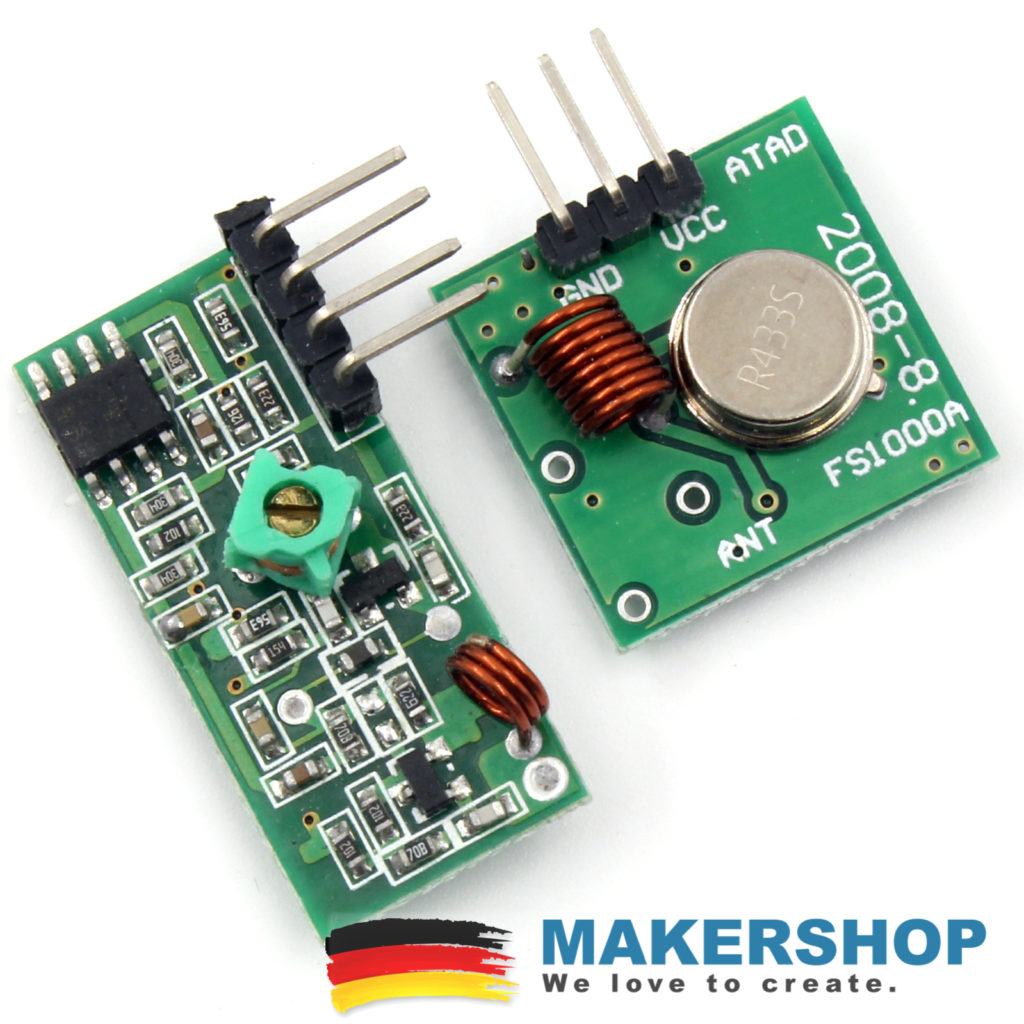
433 Mhz Sender Empfänger RF Funk Modul FS1000A xymk5v Arduino Raspberry Pi
Temperature/Humidity sensor DHT11 0.74 $; 433MHz H34A transmitter module 0.73 $; 4xAA battery holder with switch 1$; Total 3.63 $; The receiver used for the tests is an Arduino UNO (only for testing) and a H3V4F receiving module (0.66$) with a cheap arc antenna (0.32$). Sensor-sender schematics.

BrainCoding RaspberryPi and Arduino receive data from Attiny85 + 433 MhZ
These modules benefit from the addition of an antenna, which ideally is a length of wire an even fraction-0.5 or .25-of the wavelength. The frequency wavelength of 433Mhz is 69.28 centimeters. A quarter of that is 17.32 cm. The antenna should be soldered to the pad next to small coil on the receiver board. (On most boards, the pad is.

Radio communication 433MHz with ATtiny85 KalmanLabs
3 Answers Sorted by: 5 I tried those antennae and I got better range with a whip antenna made from 17cm of copper wire. Probably 1/3 to 1/2 better. Like you I'm combining an ATTiny85 and 433mhz transmitter. The transmitter definitely works better with 12V though it works quite well on 4.5V with good line of sight over about 40m for me.

USB DVBT Stick als SpektrumAnalyzer (R820T+RTL2832U) WorkisPlaying
For his project, Erdei assembled five wireless sensors, each with the same hardware, including an ATtiny85 microcontroller, 8-pin DIP IC socket, DHT11 temperature/humidity sensor, H34A 433MHz.
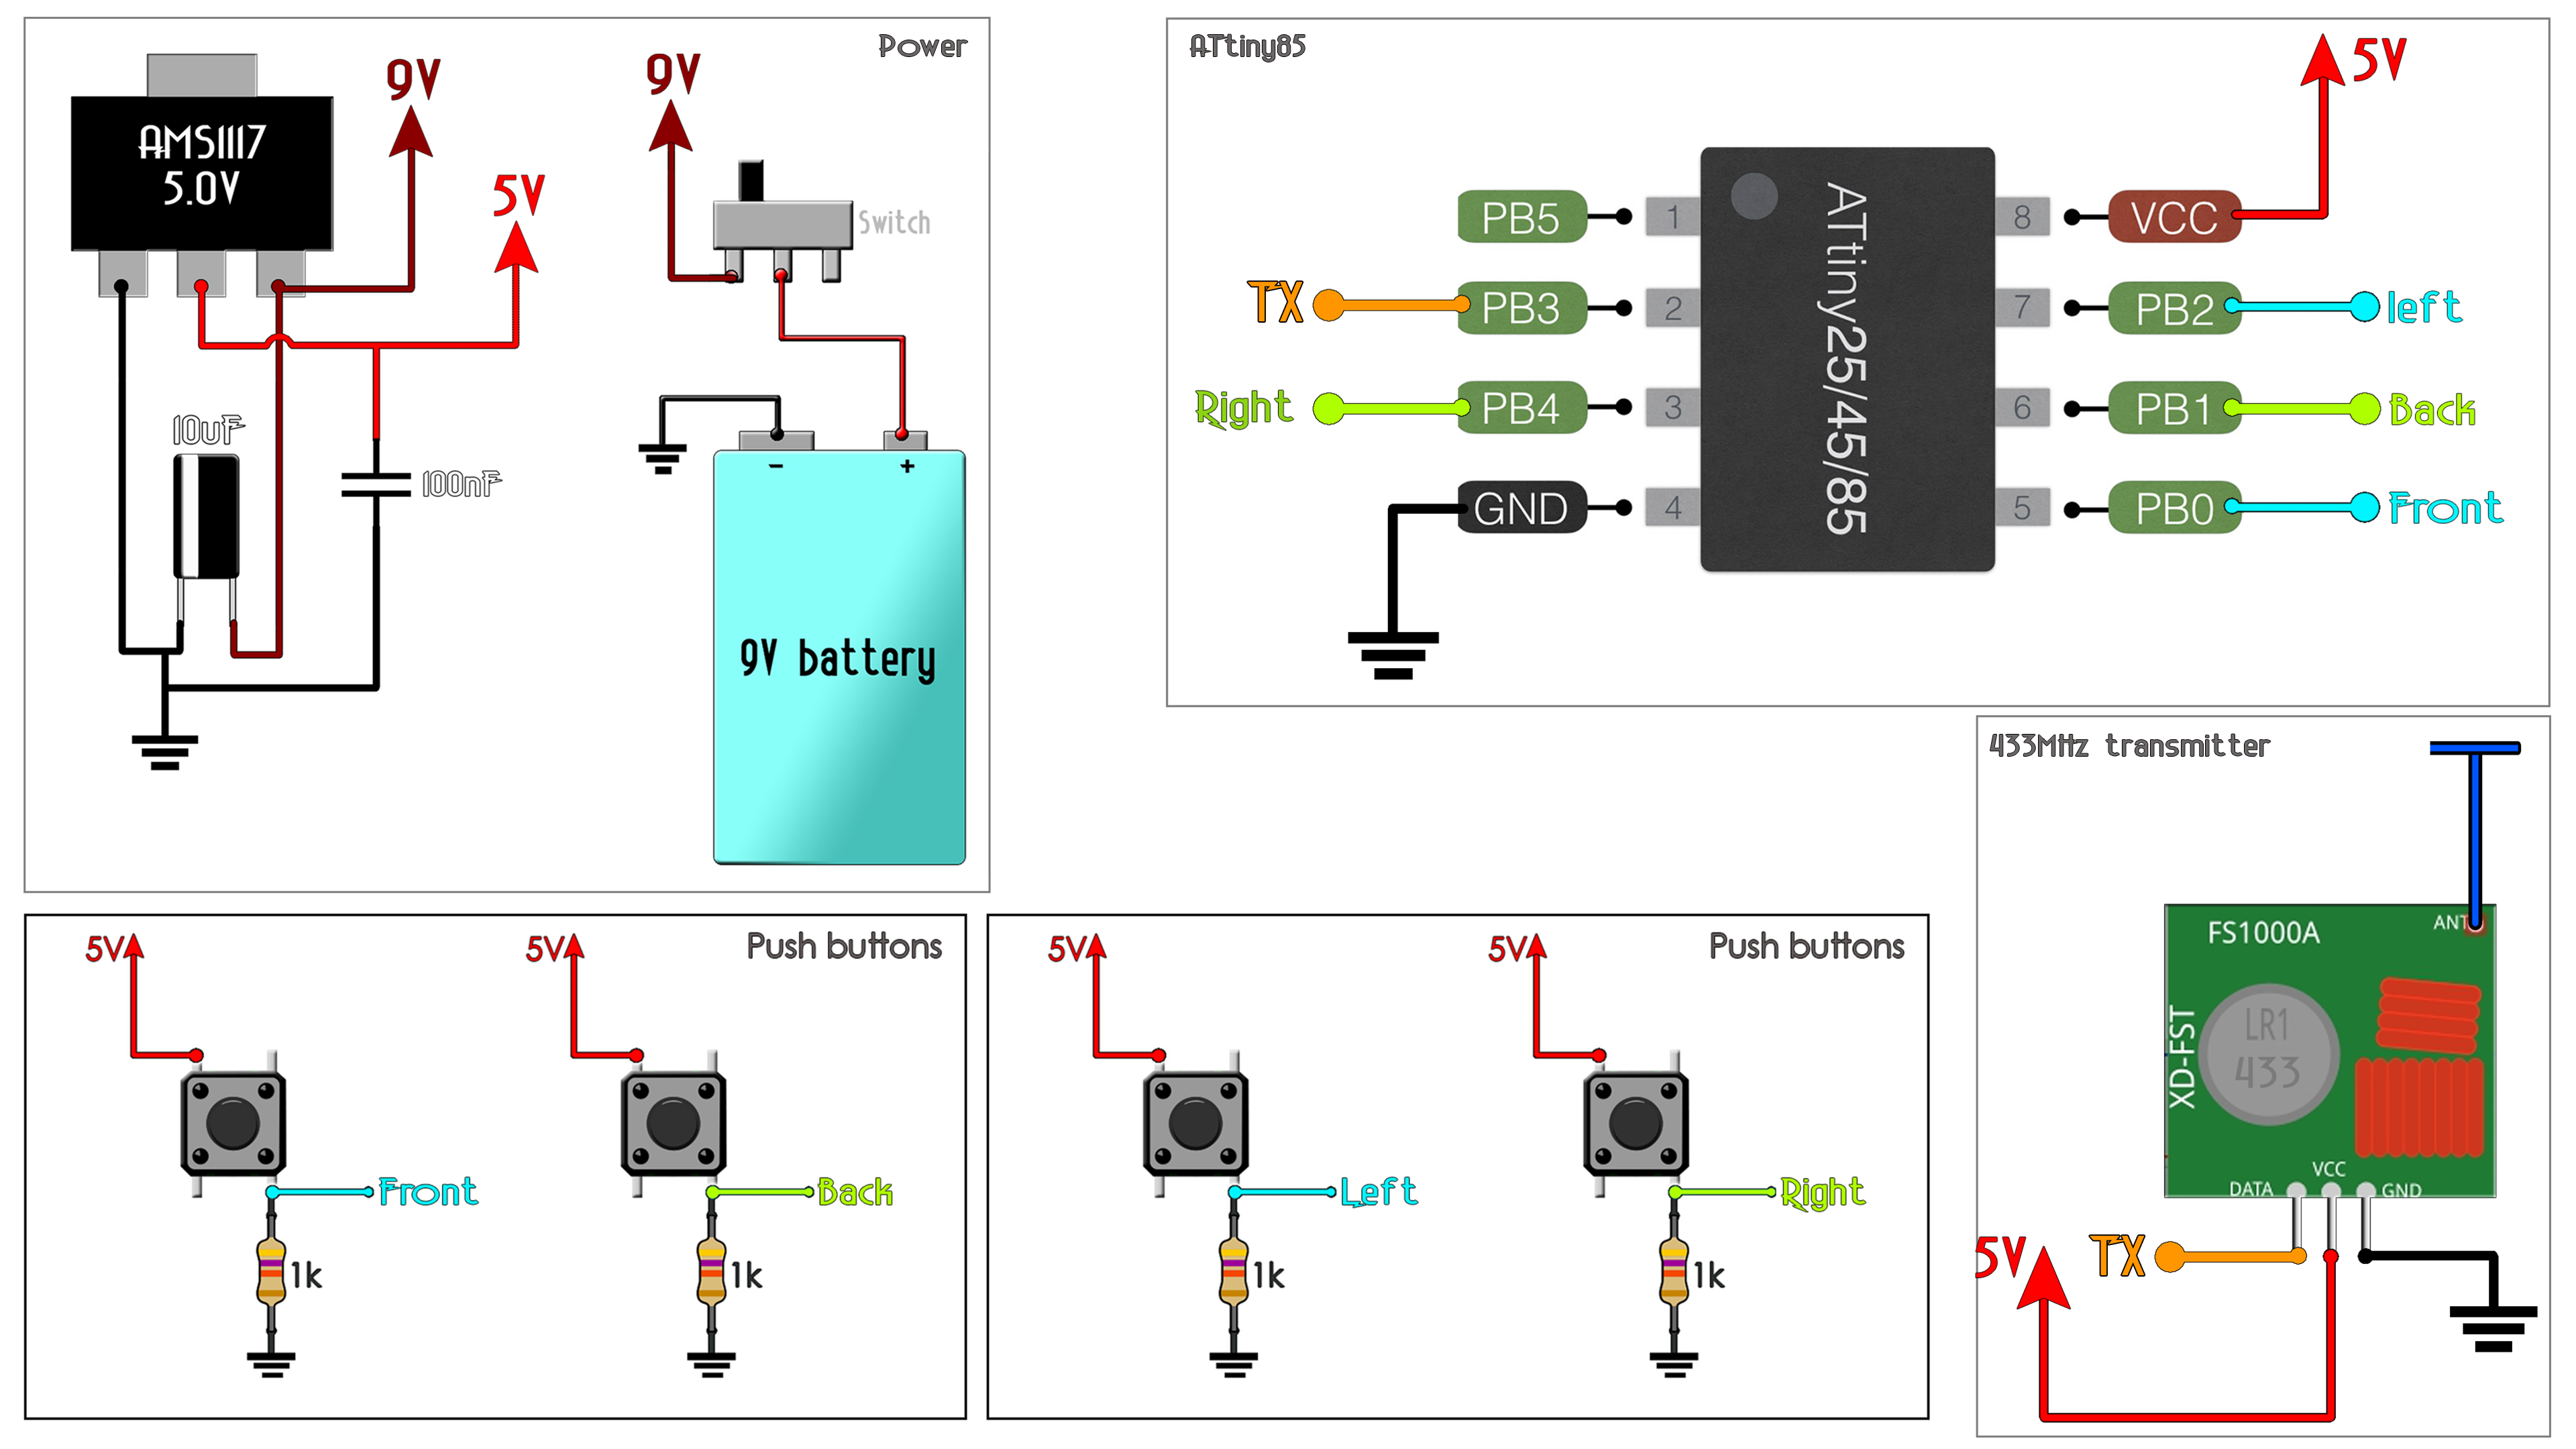
ATtiny85 radio controller 433MHz tutorial
The 433 MHz ISM band is used mostly by implanted sensors and thus allows easy integration of such into the BSN. Multiple measurement scenarios have been assessed, including varying antenna orientations, transmission distances and the number of network participants. The mean packet loss rate (PLR) was 0.63% for a single slave, which is.

Pin auf Attiny
attiny85 + rf 433 mhz questions - Microcontrollers - Arduino Forum attiny85 + rf 433 mhz questions juanmol August 20, 2013, 9:16am 1 hi!, i need to make wireless an analog sensor. I think i can do it with attiny and a cheap rf kit, it's possible? I mean somethink like that: TX: RX:
433 Mhz Sender und Empfänger NIKOLAUSLUENEBURG.DE
Most of that is accomplished in the software but it is helped by the fact that the ATtiny85 normally runs on the 1-MHz internal clock. The rule is that lower clock frequencies require less power and 1-MHz is perfect for the transmitter logic.. You can buy them (get the correct frequency) or you can make your own. At 433-MHz, the right length.
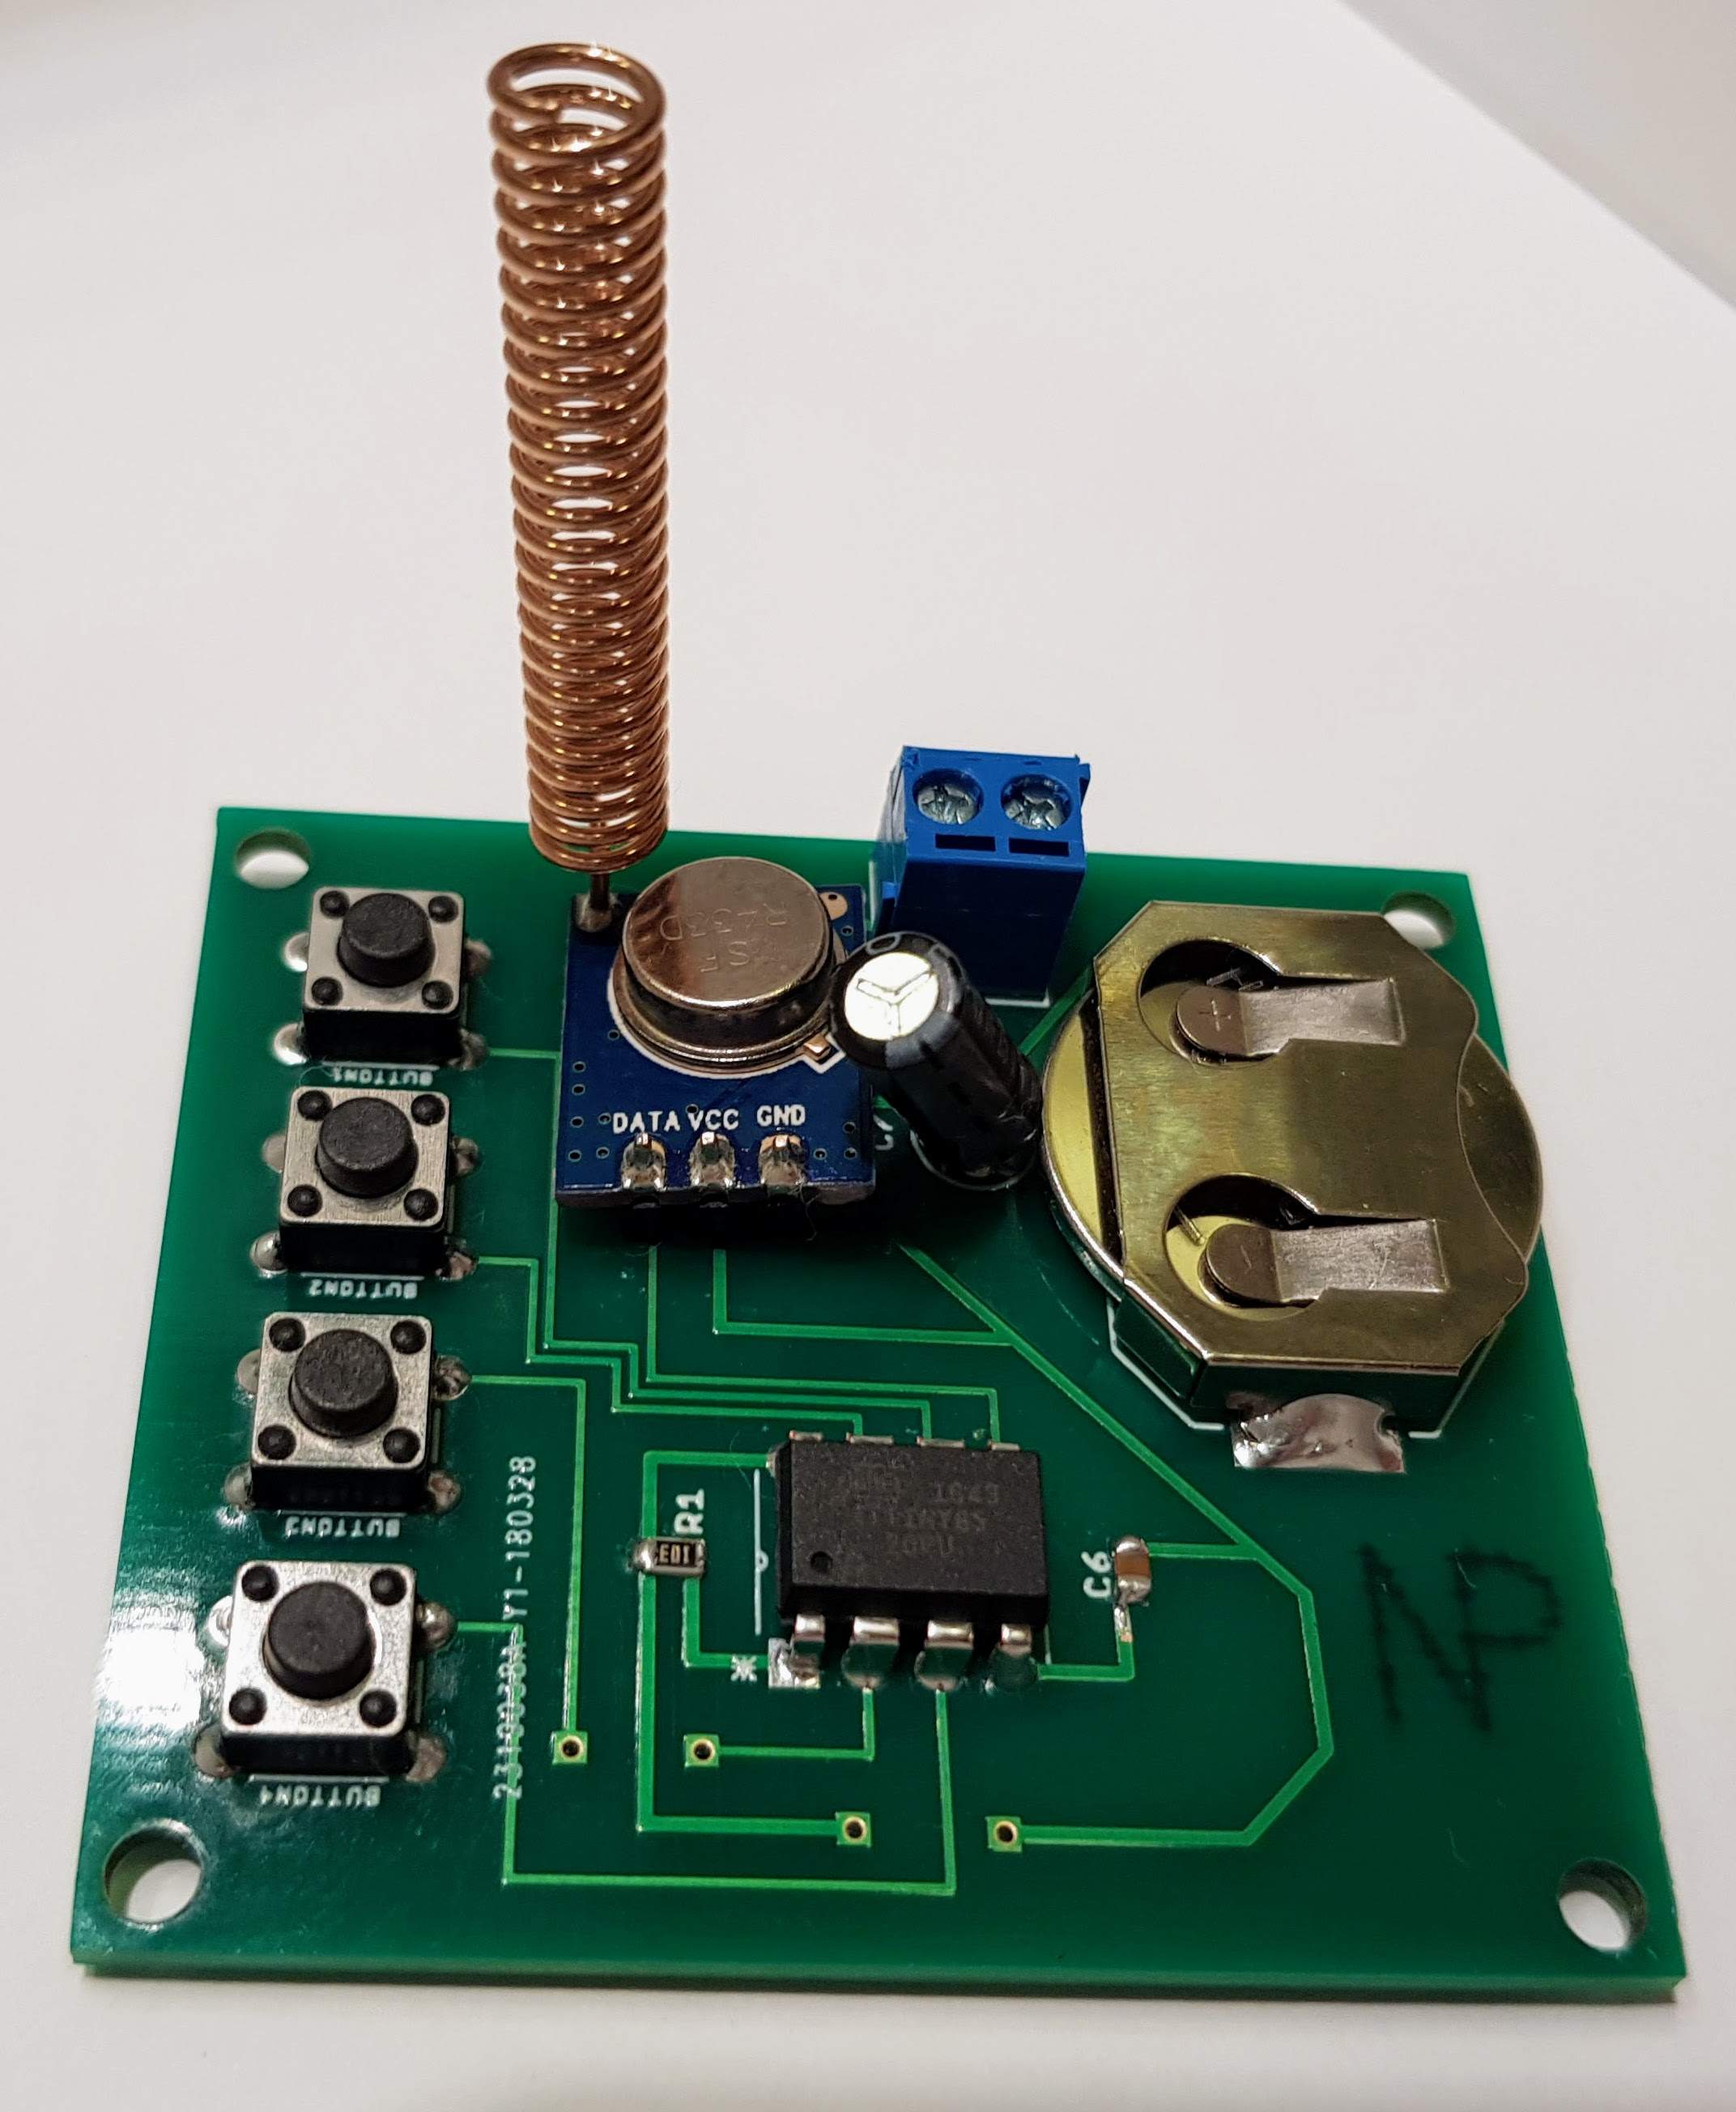
GitHub perja12/nexa_remote_control Firmware and hardware for a custom Nexa 433 MHz controller
IR reciver & RF 433MHz sender with an ATtiny85 for homeautomation I'm using an Digispark ATtiny85 with an micro USB port. IR_RF.ino = Arduino Project You need RCSwitch and IRremote library Install ATtiny support to Arduino: https://digistump.com/wiki/digispark/tutorials/connecting GitHub is where people build software.
